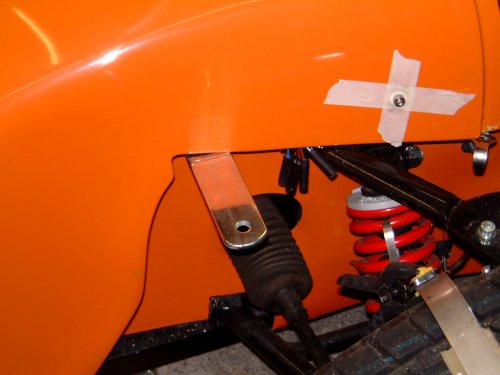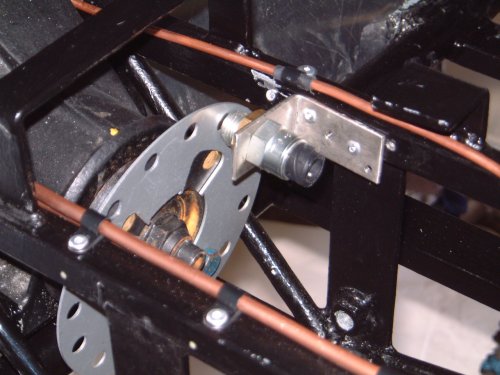
My brother made me a rather nice bracket of the speedo sensor (Thanks Paul !). It's in stainless so it won't rust, and it's thick - so it won't bend either.
|
The Electrics |
14th April 2001
|
|
My brother made me a rather nice bracket of the speedo sensor (Thanks Paul !). It's in stainless so it won't rust, and it's thick - so it won't bend either.
|
3rd May 2001
Started to put the wiring loom in place. I've fitted in round the read end and used P-clips. They look more professional than cable ties. The loom is a bit of a 'mare. Either too short or too long, but never the right length, rather difficult to handle, and it took me 2 days to label each connection. That will be worth it though. It's so much easier to curse and cuss in a nice warm living room, than it is in a half built car in a cold garage ! The wiring diagram that Giles Cooper made and Emailed is really useful. Thanks Giles.
12th August 2001
|
|
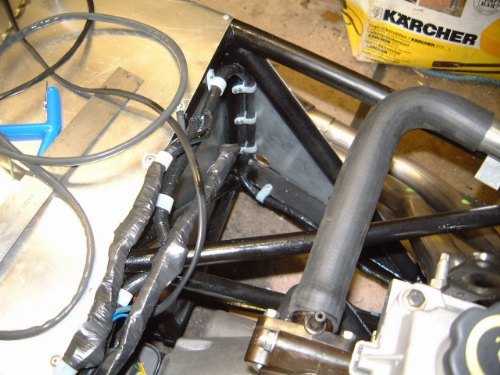
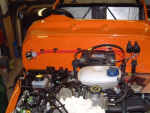
I've got most of the wiring loom in now, with the exception of the mess that is going to get hidden by the dash board, and the Webcon loom for the engine management. The loom runs as follows. The main loom from forward to aft runs down the top drivers side of the tunnel. Near the aft end it drops down to the bottom of the tunnel, then splits left and right for the lights. It runs round the bottom of the chassis from tunnel to outboard, the aft along the outer lower chassis rails, then up the rear chassis uprights (which are at about 70 degrees) In the engine bay, it comes out of the top right hand side of the tunnel, crosses left, then goes down the rear left corner of the engine bay, along the bottom, then up the front corner and along the front cross member. Problems ? Well, the wires for the fuel gauge sender were too short and had to be extended. Other than that, it has been fairly straight forward once I worked out a route that suited the loom length. I've decided to put a pair of air horns next too the battery, and the wires for the horn came out at the front of the car. To get round this I managed to break the horn wire out of the loom somewhere near where it will come out into the engine bay. To make things nice and tidy I've taped up the loom to bind all the unused cables together. Things like the heater, coil, and other bits that I won't be using.
|
7th December 2001
|
|
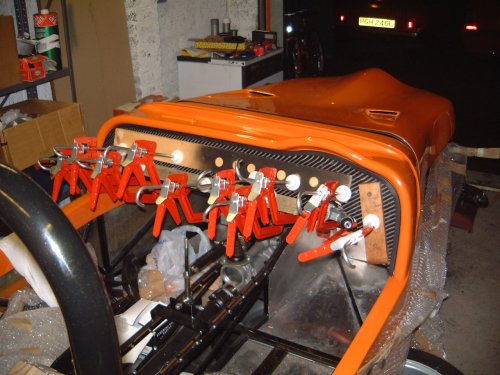
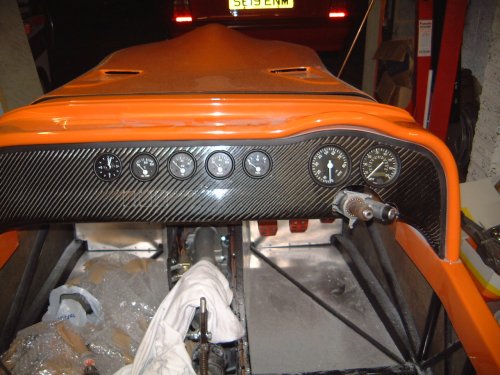
I decided to glue the carbon dash in place before I went too far with the scuttle. Tiger's demonstrator just had a raw edge to the dash which I didn't think looked very good, so I got some medium rubber U-section from Europa and used this to trim it. I have to admit, it looks the muts nuts ! The carbon dash is just a thin cover which is glued to the scuttle. I glued it on with PU adhesive, which seems to have worked well. I had to buy a shed load of clamps to hold it but they have proved very useful since. I spent quite a long time deciding on the position of the dials, mainly by cutting out some paper templates, sitting in the car and Blu-tacking them in various places till I was happy. The more observant will notice that the Rev counter appears to be on the skew. All I've got to say is "Red line at 12 o'clock" |
|
|
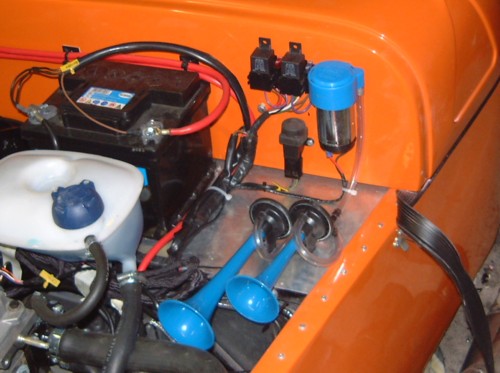
The battery has been wired in properly now. I've put the cut-off switch on the off side behind the dash. It's more of an anti-theft device that anything else. It's out of site but easy to reach, if you know where it is :~) There is a fuse holder fitted across it, so that I can keep the clock working, but the fuse will blow if you try to start the engine. You can see the 2 relays on the near side of the fire wall. These are for the Webcon injection system. The fuel pump cut-off switch is mounted just below them. There is a mass of spare loom for the injection system, and making that tidy is going to be difficult. Too many wires, not enough space to hide them. |
|
|
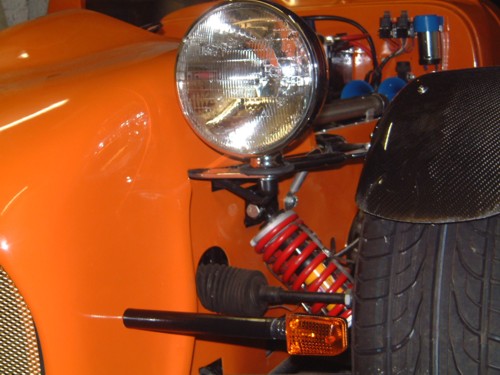
The front headlight brackets. I've mentioned them before, but they are nice and shiny, so I wanted another picture. Anybody got a problem with that ? |
|
|
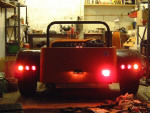
Rear lights. What a pig of a job. The wiring loom was too short, it had the wrong connectors on, the lights were too long and hit the rear tyre, etc, etc, etc. Anyway - I took the light fittings, and fitted short tails to them with bullet connectors on the end of the tails. I strapped these down to the side of the fitting with cable ties. This helped pull the end of the rubber boot away from the tyre, and also meant that I could disconnect each light individually if I ever needed to take them. I extended the loom and fitted female bullet connectors. I then spent an evening on my back connecting this lot up, and taping it up with self amalgamating tape to keep the water out. I've still got the other side to do when I can muster the enthusiasm. |
|
|
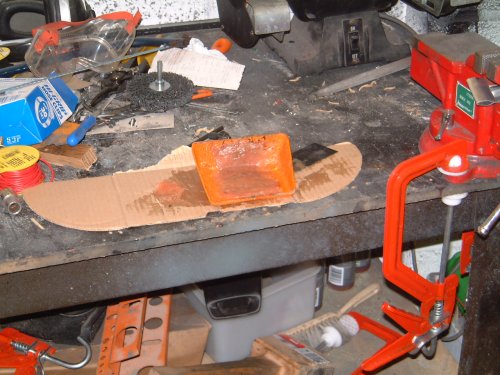
Antony was kind enough to give me a spare light fitting bracket. I gather these are the brackets from a Cat, but are just right to bring the fog light vertical to keep Mr SVA happy. Unfortunately they are a bit long (well, a lot long to be brutally frank) so I chopped the middle out and re-joined it using Davids P38 filler. That's the gap filling stuff which is loaded with chopped glass strands. Horribly messy, but perfect for the job. A bit of fine filler on the outside, and a wave of the spray can, whisper the magic words, and the join will disappear. Thanks Antony - thanks for the drive as well. His Tiger goes well, and he knows where the cameras are ;~) Just a shame about the GTi that didn't want to play at the lights. Antony's just told me that the light bracket is from the 6 kit not the Cat. He just didn't like the Tiger lights and used something else, which left him with the brackets spare - one for his fog light, one for mine :~) |
|
|
A nice loud air horn. Well, it's gotta be loud to be heard over the engine, and let's be honest, you can't have a wincy horn on a car like this. The only trouble I had was finding the space to fit it, and then breaking the correct wire out of the loom to connect it. The wire came out at the front of the car, and there was no way it was going to fit up there. |
|
|
Done the front lights as well. The headlight wasn't too much of a problem. I dismantled it and cut the mounting bolt down to size. The sharp edge is protected by some U-trim (I must have used miles of that stuff) and the nut is protected by a nut cover with a hole for the cable. I hope that will keep Mr SVA happy, and it all looks nice and neat. The indicator extensions are bits of plastic conduit sprayed black, and have nuts glued in the ends. Nice, neat, simple and SVA friendly. (I Hope !) I've got Little Neil to thanks for that idea - I was stumped till I saw his post on the Yahoo Group. |
|
|
See a few entries above - I finally managed to muster the enthusiasm to finish off the rear lights. Strangely enough, this side went much easier than the first side. The Fog and Number Plate light were easy enough. The loom is all held in place with self adhesive cable ties and bases round the inside of the body. Not such how long they will last, but they look neat enough for now. As you can see from the photo, they all work !!!! That's all the lights done except for the indicator side repeaters. Oh, by the way, if you use masking tape so you can draw on the bodywork, like I did in May, don't leave it on for 3 months. The longer you leave masking tape, the better it sticks. It took be a bleeding age to get the glue off the body :~( |