|
The Body |
20th October 2001
|
I've finally got the body in place. It isn't actually fixed yet as I discovered that I need to fit the roll bar first :~( and that hasn't been prepared yet. I'm in two minds whether to get it chromed or to paint it black. I've had quotes of £70 +VAT and £150 (I didn't even bother to ask if that included VAT) for chroming, so I might well go for painting.
|
7th December 2001
|
I've fixed the body in place now. This is riveted along the bottom of the chassis and along the top from the front of the scuttle forward. The manual said something about fitting spacer washers between the body and rear swinging arm mounts. Couldn't work out what they were on about, so I ignored it. The manual also said that you should rivet down the rear diagonal tubes, but this just pull the the body tub in and the rear wings wouldn't fit, so out came those rivets. This has left the rear of the body free to move sideways a little. Later on I will make a couple of brackets to brace the body to the rear of the chassis.
|
|
|
Fixing the rear wings. The manual said something about putting the first bolt through the body and a flat plate on the chassis. What flat plate ?? I sometime wonder which car the manual is actually written for - damned sure it isn't mine !!! I was going to do the interior trim and leave the wings till later as they stick out and are likely to get damaged. However, I noticed that the fixing points are underneath the trim. Lucky I spotted that one !!! It took numerous attempts to get the wings in the correct position, but we got there eventually. Then it's a simple case of marking and drilling the holes, and fitting the bolts with penny washers. The very front bottom bolt is tapped into the chassis bottom rail. The trim is just trapped in place, and this seems the best way. It's well held, and it was a right pig to get in the right place. The rear wings are definitely a 2 person job. |
7th January 2002
|
Paul, my brother, made me a nice trim for the hole where the exhaust comes out of the body. Nice a shiny, and it finishes the hole well. |
|
|
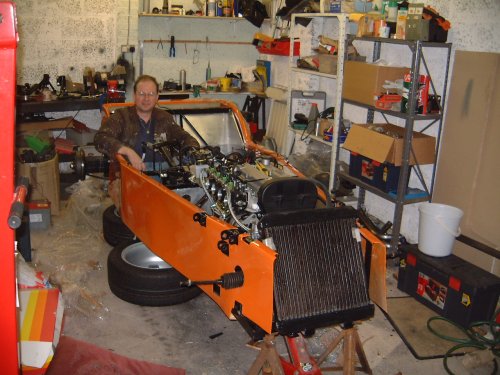
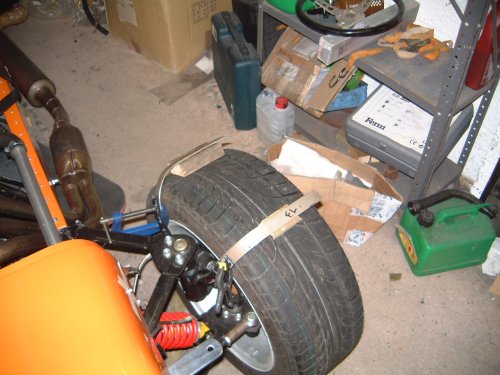
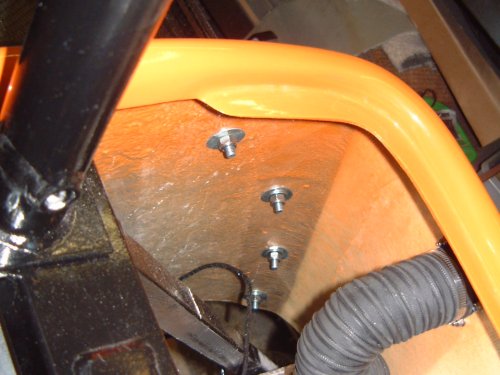
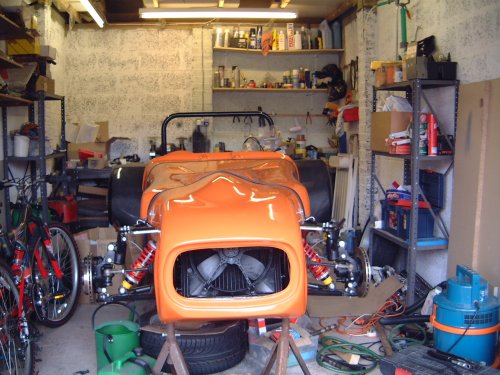
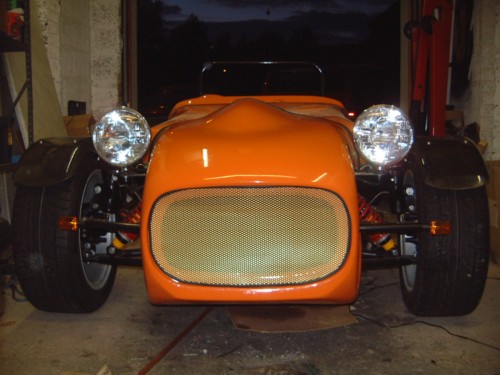
Fitting the bonnet and nose cone was a bit of a night mare. The bonnet went on OK. I lined up the scuttle, lined up the bonnet against the scuttle and fitted the clips to the bonnet and body. That sentence took about a week to do !!!! The rear 'over-centre' clips were fitted by, A) making backing plates out of stainless to spread the load a bit, B) riveting the top bits in place, and C) marking the bottom holes, then allowing an extra 2 mm to give the clips a bit of tension. How did I come up with 2mm ? Well, it was a lucky guess, but I did have a practice on some scrap wood first to make sure it would work. 
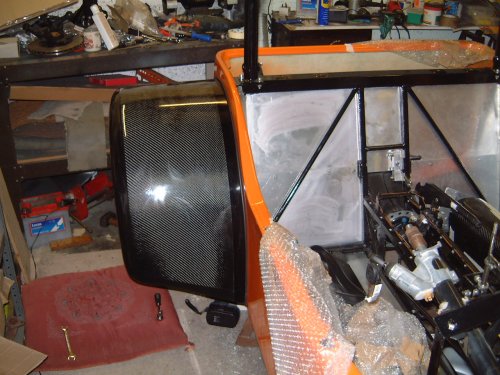
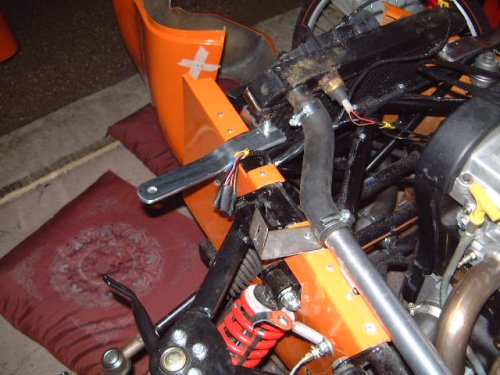
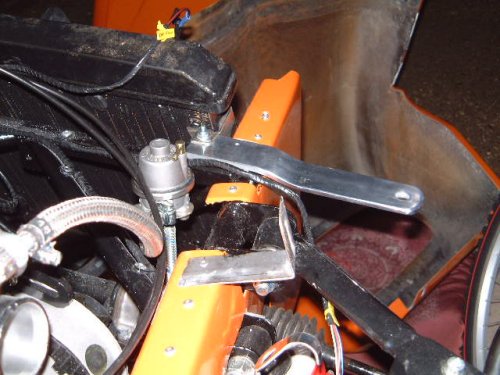
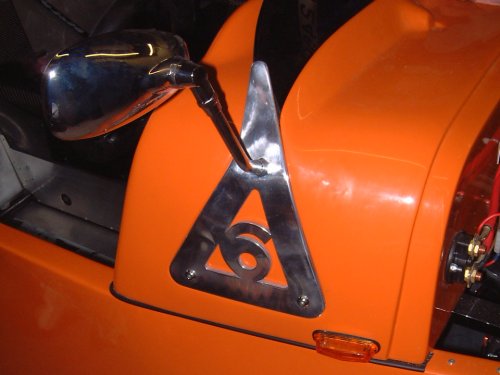
The nose cone was a real pain in the butt. I eventually made the angle brackets you can see in the pics, and there will be a domed bolt (motorbike fairing bolt) to hold the nose cone. The fit is not brilliant, but the consensus is that it will improve as the engine warms the fiber glass. Fingers crossed. 
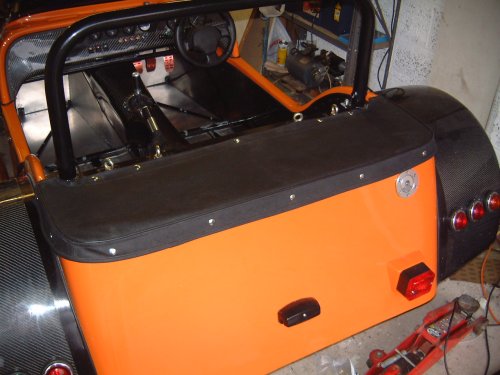
I put rubber U-trim on the front and rear of the bonnet. I think it was Neil Toyne (or possibly Paul) who suggested this. Bloody brilliant idea. It protects the bonnet and covers a multitude of sins. 
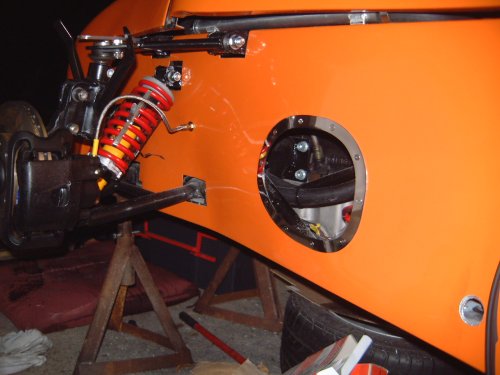
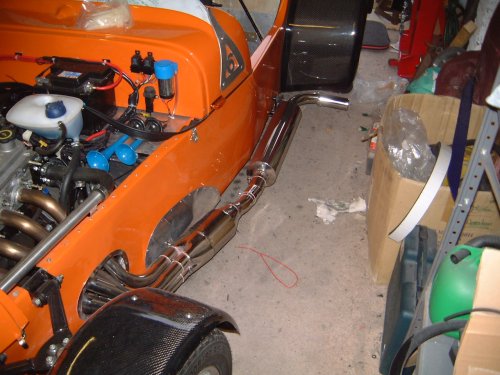
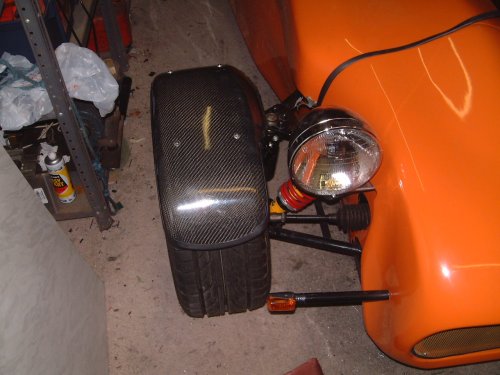
Notice the head lamp brackets are bent down. This is because they were stopping the nose cone come down far enough, and I didn't want to cut too much out of the nose cone and weaken it. They polished up quite well.
|
|
|
|
The side panels went in quite easily. The biggest problem is the gap at the top, just below the roll bar. I'm still not sure what I'm going to do about this yet - any suggestions will be very welcome. The panels are all trimmed with rubber U trim to finish them off. They are all screwed in, either with self tappers where the go into the chassis, or with those flat captive nuts (from Halfords) where they go into fiber glass. I got a spare piece of flat carbon panel from Tiger (thanks Sue) to cover the ally between the seats. It also covers the hand brake cable clamp as well.
|
|
I'm very pleased with the hand brake and gear lever trims. My brother made up the stainless steel trims, using an ally pattern that I made, and Dawn, my next door neighbour, made the gaiters for me out of an old black leather jacket. It was a bit of a pig getting them to fit, but it does look good. It's not quite finished yet - I've got the adjust the gear lever reverse stop before it's all bolted down. The trim bolts also need polishing - and I will need a new polishing mop soon. The matching gear knob and hand brake handle came from Europa, but I think Halfords also sell the same things. They're quite expensive, but really suit the car. |
|
The silencer actually went on OK. I thought it was going to be trouble. With the Cat, the silencer was too short, or the body was too long, or the engine too far forward or something. Mutter, whinge, moan. Anyway, my brother made me a nice extension piece which sorted the problem. The bracket to hold the silencer, was a flat bit of 1/4" bar. Not in the slightest bit over-engineered - Colin Chapman would turn in his grave. Anyway, a few holes and a bloody big lump hammer later, one bracket that fitted. It's secured with one bolt through the chassis rail that the seat fixes to, and another through the ally floor, braced with a small stainless plate to spread the load. |
|
|
Not really done much here yet. My brother leapt to the rescue yet again and made some stainless brackets to support the wing. I really didn't like the Tiger method of just bolting the wing to the little tabs that are the wrong angle and wrong position. The plan is that I can get the brackets on in the right position, at the same height, and the wing will just drop on. (Who's kidding who ?) |
|
I used blocks of wood to get a nice even space between the bracket and the tyre, then chose the position of the wing. It's a bit further back than Tiger's design, partly to cut down spray off the front wheels (Thanks for the tip Antony), partly because I think it looks better. That meant attacking the inside with a 'Dremel' and sandpaper. Once I'd fixed the position, marked it up with masking tape, then drilled some holes, it went on nice and easily. It actually to a whole day to get right, but time well spent. It looks right and is somewhat more rigid that the Tiger design. |
|
|
The dome headed bolts look good as well. All that remains is to paint the inside of the wings with RubberCoat, then paint the brackets black and polish the bolts. (Gotta be nice and shiny :-) ) |
|
I fitted a nice golden coloured expanded ally mesh grill. Well, it's not actually fitted yet, but it's cut to size and has (yet more) U trim round it. I tried the Tiger supplied grill, but it didn't fit that well you can see too much through it. I think I'll use dome headed allen bolts to fix it. They will be something else I can polish :~) Doesn't the car look good from the front ? (Please don't disagree or I'll run over your foot !) |
|
I got round to polishing the exhaust system and fitting it permanently. I had been told that the Cat wouldn't polish up. Wrong - an hour with a polishing mop and it's like a mirror. You can also see the heat shield, which is polished ally. Hot tip of the day - fit the heat shield BEFORE the CAT. |
|
|
I've started fitting the aeroscreen. If you look, you can see where I've tapered the stub of the screen pillar - looks much nicer than just chopping it off square. The perspex cut OK with a jigsaw running at full speed, although it chipped if you tried to run the blade slowly. The next job is to work out how to fix it in the channel in the scuttle so it can come out and be replaced with a full screen for winter use. |
|
The aeroscreen is finished now. I got some square, felt covered U section from Woolies which was just about right to hold the screen in the channel. I tiny bit between the ends and the pillars holds it all nice and firmly. The ally pillars polished up nicely, but what a messy job. They ended up shiney - I ended up black as a black thing that had been painted black. I had fun trying to find nuts to hold the wing mirrors on - I eventually found out that they were an M10 fine thread. When I quizzed Tiger about them, they just told me to take the decorative nut off the outside and put it on the inside - Ugghhhh !!!! The edges of the perspex sanded down to a radius quite easily and polished up easily to. I just smoothed them down with successively finer grades on wet 'n' dry, and finished off with polishing compound.
|
|
|
The rear cover only presented one challenge. How to fix the press studs to the cover. I took a tip that I heard ont he Yahoo group sometime and used a crosshead screwdriver, which split the tube into 4 fairly neatly. The 4 tags were then pushed over with a flat bladed scredriver and finally flattened with a 1/4" socket driver. Nothing like the right tools for the job, eh ? Woolies do sell a tool to do the job properluy, but it's expensive. |
|
|
The dash board has been finished now. It took me a couple of evenings to tidy up the wiring loom and fix the dials and switches in place permanently. I have to say that I'm very pleased with the way the dash has turned out. I'm even more pleased that everything works!!!! The tunnel cover is fitted permanently now as well. I ran into a minor problem in that I had to push the knob down to select 5th gear. That was caused by the linkage fouling on one of the trim fixing bolts. I attacked the linkage with a angle grinder and the problem went away. You can solve a lot of problems with an angle grinder :~) |
|
Got the seats fitted now. The Driver's seat is mounted on some spaces, and the passenger seat is mounted on a bracket made by my brother (Thanks Paul). Unfortunately I think the seats are going to be a little high and may make the upper seat belt fixing point too low. Plan A is to have it tested as it is, then lower the seasts if necessary. The seatbelts went in OK. |
|
|
Here you can see the rubber U-trim fitted to the wing. This is just Super-glued in place. Keeps Mr SVA Inspector happy, and it looks nice. In case anybody is wondering, it's not going to fall off, there's nearly half a bottle of glue holding it on !!!! |